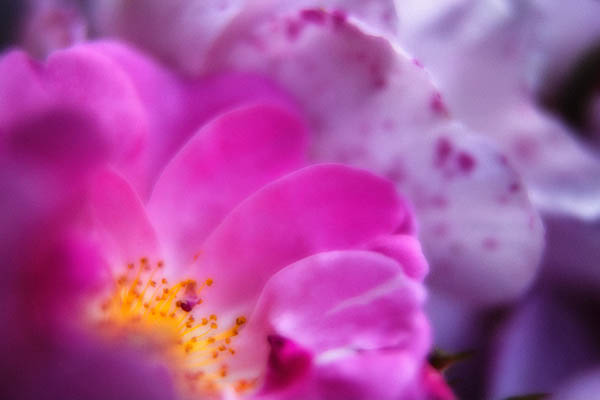
Foxfire Revisited

roll mouse over for original version
foxfire2

This week, I learned an important lesson. I was scrambling to get ready for a show at PhotoCentral. I was going to print out Foxfire for the wall at 11×16.5". I had accidentally saved a web sized version over the original (processed) image. Well, I thought no problem. I have the digital raw file and I will just re-process the image. Well, two hours later and 5 versions later. I realized that I could not reproduce my original processing even though I knew that I had done it quickly that night in Yosemite being very tired. This second version took hours to do and required about 30 adjustment layers to achieve. I do like it better than my original processing but… I am reconsidering flattening my processed images with the belief that I can re-create the processing.

To see the original processed version roll the mouse over the image.

Embarcadero Field Trip #4

Embarcadero Field Trip #4
embarcadero4

This one was taken in the parking garage when finishing our field trip to the Embarcadero Center on Saturday. This is part of my "Mysterious or Surreal Mood" assignment.

I helped the lighting along in Photoshop by quite a bit. I wanted to put more light on the mirror and let the rest flow into mysterious darkness (at least I hope that is how it appears). To achieve this effect, make sure that your image is 8-bit color because the Lighting filter does not yet work wiht 16-bit color. Add a blank layer. Make this layer’s blending mode be Soft Light or Overlay. Fill the layer with neutral grey (RGB 128, 128, 128). Now, run the Filter | Rendering | Lighting filter. From there, you have a lot of light choices, I usually stick with Flashlight or Omni. For this one, I was more adventurous and put in Five Lights Down. Since the lighting is on a grey layer. I could blur the edges and fine-tune the effects without losing image detail.

Yosemite Drive-By #1

Yosemite Drive-By #1
yosemite-drive-by1

This was taken from the car as Chip was driving up to Glacier Point in Yosemite. I was going through an obsessive photographer thing about missing shots as we zipped past. So I took out my camera, I started shooting images. I threw away 100+ duds but there is a handful of interesting images that resulted. Also, I made myself car-sick taking these images.

On a technical note, this image was not manipulated in Photoshop except for a levels adjustment. This image was taken through a car windshield and the camera was hand-heldw with aperture of f/22 and with a shutter speed of 1.3 seconds.  I did auto-focus probably on the yellow bush on the left before pressing the shutter.  My camera’s auto-focus mode does detect movement of the focus point and try to track with that movement.  I believe that predictive auto-focus gives the stuttering/streaky quality to this image.

Making of 'Warning – Smoking Area'

Warning – Smoking Area
2006-09-03 SF_MG_4800-01C

Whenever I start composite, I look for two compatible images. How to determine if two images are compatible is really trial and error. In this case, I started with the image of the smoking area. I knew it was promising because there was a lot of whitespace. The marsh scene was a recent image and just jumped out as a twin image. Sometimes, I try 12+ different combination of images before finding a suitable partner, and sometimes I veer off with two different suprisingly compatible potential ’twin’ images in a totally different direction. For this image, these were the only two images that I tried.

base1 base2

The next step is to place one image above the other image. I usually change the Opacity of the upper layer to ~60%. That way, I can more easily see the interactions. Then, I start cycling through the upper layer’s blending mode. For my base layer, I used the marsh scene and the upper layer was the smoking area. After cycling through the blending modes for the upper layer, I saw a few possibilities but no winner. However, I decided to invert the upper smoking area image. Voila, I differenced the images and had a very interesting starting point. For the right-hand image below, the upper layer opacity is 58% and blending mode is Difference.

base1_inverted inverted-difference

At this point, I liked the Tapestry effect in the background wall, but I was unsure about the void of the palm leaves and its pot. I decided to add back the original smoking area image but masked for the void area. To create the mask, I copied the original smoking area to the clipboard for use in the mask. Then, I copied the original smoking area layer and moved it to the top of the layer stack. I added a layer mask to the top layer and pasted in the copy of the smoking area image from the clipboard into the mask. To copy into the mask, make sure that the layer mask thumbnail is selected in the Layers view before pasting. For a layer mask, black conceals and white reveals. The mask needs to be inverted.

Next, I needed to see the mask so I held down the Alt key and clicked on the layer mask thumbnail. This makes the image mask visible in the image area. Then, I did a levels adjustment to greatly darken the shadows of the mask and brighten the highlights. To go back to viewing the image, I clicked on the image thumbnail in the upper layer. I left clicked the upper layer (of the original smoking area) at 100% Opacity and blending mode of Normal. After a little fine-tuning of the mask, I had the following image. For the right-hand image below, I added back some contrast.

palms added back palms added back2

At this point, I thought the image looked pretty close. I used two Nik filters to pop colors using the contrast color range filter add some green using the Nik Cross Process filter. For the next step (right image below), I added the Nik Bi-Color Violet/Pink filter to warm the image and add blue to the top of the image.

color-twiddle1 color-twiddle2

This is image is very close to done. I decided that the shadow details in the palm fronds are too blocked up. So, I applied a Shadow and Highlight adjustment to open some details in the palm fronds. For the final right-hand image below, I applied a small Levels adjustment to brighten the overall image. The image is done.

shadow-and-highlights final

Orton Technique

Orton Technique
2006-07-01 Berkeley Rose Garden_MG_4444-02

Tonite, I am deeply touched by Terri’s recent post. Terri authors Wind Lost, a blog, about her struggles with chronic tension headaches which she handles with grace and courage. Terri is also a gifted photographer. Her posting has inspired me to try out some new techniques with my black and white photography, called the Orton technique.

I attended a Freeman Patterson/Andre Gallant workshop recently and both use the Orton technique regularly. The basic idea is to combine two shots together of the same scene. Both are overexposed. The first shot is overexposed by 2 stops and sharp (think f/22). The second shot is out-of-focus with the lens wide open and about 1 stop overexposed. If you shoot slides, you sandwich the slides together. If you are digital, you combine the images into a single Photoshop file. Place the out-of-focus layer on top of the sharp layer and change the blending mode to Multiply. See here for a Orton Photoshop action.

You can simulate the Orton technique using a single image. Open and image. Add a Level Adjustment Layer. Move the midtone slider to something like 1.50 (this you can play with later). Copy the background layer and place it above the adjustment layer. Now, change the Blending Mode of copy to Multiply. Apply Lens Blur onto the copy of the background layer. If your version of Photoshop does not have Lens Blur, go ahead and use Gaussian Blur. The more blur means the stronger the effect. Finally, add a second Levels adjustment layer on top of your blurred layer. Adjust the level’s midpoint to something like 125. From here, you can experiment with the level adjustments, amount of blur, etc.

If you would like more inspiration, Andre Gallant has a book called Dreamscapes.

If you are considering taking a photographic workshop, I would wholeheartedly recommend the Freeman Patterson-Andre Gallant workshop. I had a fantastic time and loved Canada. I have never met nicer people. As a bonus, I met many wonderful photographers.

Accidental Self-Portrait

Accidental Self-Portrait
2006-08-20 Santana Row_4

This is another from my baby-steps into black and white film photography. I was upstairs in the Borders bookstore in Santana Row. I noticed the palm fronds outside the window and thought — hmmm maybe a good black and white photo. Instead here I am gripping the camera (in bad form because my left-hand is not cradling the lens) appearing through the blurry fronds. I was using manual focus and I am not sure what I thought was sharp. I am using my favorite 50mm f/1.4 lens which is my default lens when I need lightweight, fast, etc.

On a digital technique note, I tried simulating the creamy effects of a cold head enlarger using Noise Ninja. Actually, I have never been in a wet darkroom and did not know what that meant but I do like the effect. For all the details, check out Doug Plummer’s Dispatches.

On the humorous side, I spoke to Mother this morning. She has already called my B&W film adventure ’stupid’. For any B&W photographers reading this posting, please do not take offense, just remember that she does not really know anything about photography. Well, she saw yesterday’s post and said "I guess it is pretty enough if you could just add some color."

Haunted House #4

Haunted House #4

Another from my Freeman-Gallant workshop. This was an assignment at the Haunted House. We were supposed to expose for the window. Well knowing that I was shooting raw, I could let some of the highlights blink on the back of my camera. Turns out that the blinking highlights is based on luminosity of Adobe RGB. That is very conservative and highlight details about 1-stop (or more) are stilled captured in the raw file. For this case, I did not mind some solid white in the window but wanted detail in the tree. So when processing raw files in Rawshooter, I could do a small amount of negative exposure compensation, add a bunch of fill light, and reduce the highlight contrast. Voila, I have an exposure in a very trickly lighting situation without using anything except natural light.

If you want to retrieve more highlight details, you would need to process the raw file twice. Once for the highlights and once for the shadows. Then, you can combine them using Photomatix Pro HDR tool or just masking in Photoshop.

Freeman Patterson’s Garden #2

Freeman Patterson’s Garden

This is another image taken around Freeman’s beautiful gardens. I used the ‘Dreamscape’ technique taught in the workshop. If you are shooting digitally, start with a tripod. Compose your shot. Overexposure by 1/2 stop with a large depth of field. Then, open the lens wide open and over-exposure by 1 stop. Also, de-focus the lens enough where the details are obscured by the main compositional elements are still obvious. Take a second shot. Open the first image in Photoshop. Then, open the second image in Photoshop. Select the Move tool (‘v’ key), hold the Shift key, and drag the second image on top of the first one. Your first image should now have two layers with the out-of-focus layer on top. Change the blending mode to Multiply for the second layer.

If you shoot digitally and use raw files, then you do not need to shoot the second out-of-focus image. Process the first image with an exposure compensation of +1/2. Then, process the raw a second time with an exposure compensation of +1. In the second image, apply a Lens Blur (enough to loose all the smaller details). Change the second layer’s blending mode to Multiply. You may need to do a Level adjustment to taste.

Panning Poppies

Panning Poppies

One of the techniques that I learned from the Patterson-Gallant workshop was panning. You want to start with an exposure timeof 1/4 to 1/2 seconds usually with a fairly large depth of field like f/22. Going with a longer exposure time results in mush. Make sure that you are correctly focused before you start. Trip the shutter and pan the camera. In general you want to pan with your subject. For example, pan up and down for tree trunks. In this case, I was shooting a bed of unopened oriental poppy blossoms. I thought that I panned along an arch shape but it really looks like I panned from upper-right to lower-left.